Water Bath Canning for Beginners: A Simple Step-by-Step Guide
Are you new to canning? This beginner-friendly guide covers everything you need to know about water bath canning—supplies, recipes, safety tips, and step-by-step instructions.
Inside this post:
- 1 A Simple Step-by-Step Guide to Start Water Canning with Confidence
- 2 What Is Water Bath Canning?
- 3 Pros and Cons of Water Bath Canning
- 4 What Foods Can You Can with This Method?
- 5 Water Bath Canning Supplies You’ll Need
- 6 Where to Find Safe & Tested Recipes
- 7 Water Bath Canning Safety 101
- 8 🫙 How to Water Bath Can: Step-by-Step
- 9 Rules You Really Need to Follow
- 10 Beginner-Friendly Recipes to Try First
- 11 Common Mistakes to Avoid
- 12 Water Bath Canning FAQs
- 13 You’re Ready to Start Water Bath Canning!
A Simple Step-by-Step Guide to Start Water Canning with Confidence
So you’re thinking about trying your hand at home canning? First of all—yay, you! There’s something seriously satisfying about lining up jars of homemade jam, pickles, or salsa that you sealed up yourself. And if you’re a total beginner, water bath canning is the perfect place to start.
It’s simple, budget-friendly, and doesn’t require any fancy equipment beyond a big pot and a few kitchen tools. This guide will walk you through everything you need to know—from what foods work best to the safety rules you actually need to follow—so you can start canning with confidence and skip the overwhelm.
Let’s get those jars clinking!
What Is Water Bath Canning?
Water bath canning is a method of preserving high-acid foods by processing them in a large pot of boiling water. The heat kills off any bacteria or mold, and as the jars cool, they form a vacuum seal that locks in freshness and keeps your food shelf-stable for months (or even longer!).
This method is:
- Great for beginners
- Perfect for jams, pickles, fruits, and salsa
- Safe for high-acid foods only (low-acid foods require pressure canning)
Unlike pressure canning, which uses steam and high pressure to get the job done, water bath canning just needs a deep pot, a rack, and enough boiling water to fully cover your jars. It’s straightforward, low-tech, and incredibly rewarding.
Pros and Cons of Water Bath Canning
Water bath canning is perfect for beginners because it’s approachable and doesn’t require a huge upfront investment—but like anything, it has its limitations. Here’s a quick breakdown to help you decide if it’s the right method for your food goals:
Pros:
- Beginner-friendly – No pressure gauges or complicated equipment required
- Affordable – Most people can start with tools they already have in the kitchen
- Great for small batches – Perfect for preserving a few jars at a time
- Satisfying and fun – There’s nothing quite like hearing that “pop” as jars seal
- Fantastic for sweet and tangy recipes – Jams, jellies, pickles, and relishes shine here!
❌ Cons:
- Limited to high-acid foods – You can’t safely can meat, soups, or most vegetables with this method
- Takes time – The boiling and cooling process isn’t exactly fast, especially for large batches
- Still requires attention to detail – You need to follow recipes carefully to keep things safe
Bottom line: if you’re looking to preserve summer fruits, vinegary pickles, or tomato-based goodies, water bath canning is a fantastic way to start. You’ll gain confidence and skills that’ll serve you well if you ever decide to try pressure canning later on.
What Foods Can You Can with This Method?
Water bath canning is ideal for high-acid foods, which naturally resist harmful bacteria when processed in boiling water. It’s also safe for some foods that have added acid (like lemon juice or vinegar) to bring their pH into the safe zone.
Here’s a list of beginner-friendly foods that are perfect for water bath canning:
Fruits & Fruit Products
- Jams, jellies, and fruit preserves
- Applesauce
- Fruit butters (like apple butter or peach butter)
- Whole or sliced fruits in syrup (peaches, pears, cherries, etc.)
- Pie fillings (use tested recipes only)
Pickled & Fermented Foods
- Cucumber pickles (dill, bread & butter, garlic, etc.)
- Pickled beets
- Pickled onions or okra
- Relishes and chutneys
Tomato-Based Recipes (with Added Acid)
- Crushed tomatoes
- Tomato sauce
- Salsa (only tested high-acid recipes!)
- Pasta sauce (must follow a tested recipe with acid added)
Acidified Foods
- Foods that have had vinegar or lemon juice added to safely lower the pH
- Some barbecue sauces, ketchups, and marinades (when using safe, tested recipes)
Important Note:
If a food is low-acid (like green beans, carrots, potatoes, meat, or soup), it cannot be safely processed with a water bath method. Those foods must be pressure canned to avoid the risk of botulism.
Stick with the foods above, follow a tested recipe, and you’ll be good to go!
Water Bath Canning Supplies You’ll Need
You don’t need a ton of fancy tools to start water bath canning—but having the right gear makes the whole process smoother (and way less stressful!). If you’re just starting out, you can even use items you already have in your kitchen.
Here’s what you’ll need:
Must-Have Supplies
- Canning jars with lids and bands – Mason jars (like Ball or Kerr) are made for canning. Use new lids each time; bands can be reused.
- Large stockpot or water bath canner – Your pot needs to be deep enough to cover your jars with at least 1 inch of boiling water.
- Jar rack or a folded towel – Keeps jars off the bottom of the pot to prevent cracking and allow water to circulate.
- Jar lifter – Lets you safely move hot jars in and out of the water without burning your hands.
- Funnel – Makes filling jars neat and easy (especially with runny jams or chunky pickles).
- Bubble remover or spatula – Helps release air bubbles from filled jars before sealing.
- Clean towels or cloths – For wiping rims, drying jars, and setting them out to cool.
Nice-to-Have Extras
- Headspace measuring tool – A handy little stick that helps you fill jars to the correct level.
- Magnetic lid lifter – Makes grabbing hot sterilized lids a breeze.
- Labeling supplies – A Sharpie and some cute labels make it easy to keep track of what’s what.
You can buy a complete canning kit for under $20, but you can also piece together your own setup. Just make sure your jars fit your pot and your tools keep things safe and sanitary.
Where to Find Safe & Tested Recipes
When it comes to canning, not all recipes are created equal. Unlike regular cooking, canning recipes have to be scientifically tested to make sure the food is safe to preserve—and won’t spoil or grow harmful bacteria over time.
So where should you look for recipes you can trust?
Trusted Sources for Water Bath Canning Recipes:
- The Ball Blue Book Guide to Preserving – A classic canning bible full of beginner-friendly, lab-tested recipes.
- National Center for Home Food Preservation – Run by the USDA, this site is packed with reliable recipes and safety guidelines.
- USDA Complete Guide to Home Canning – A free downloadable resource with safe processing times and techniques.
- University Extension Programs – Many offer free canning publications (search “water bath canning site:.edu” for local info).
- Ball® and Kerr® Brand Websites – Great for modern recipes like small-batch jams or spicy salsas.
Avoid These Recipe Sources:
- Random Pinterest posts with no sources
- Old family recipes that haven’t been updated for current safety standards
- YouTube videos that “eyeball it” or skip steps like acidifying tomatoes
- Anything that tells you oven canning is fine (it’s not!)
If you’re ever unsure about a recipe, skip it or double-check with one of the trusted sources above. Canning is amazing—but only when you follow safe methods.
Water Bath Canning Safety 101
Canning is fun and rewarding, but safety is not optional—especially when you’re preserving food to sit on a shelf for months. The good news? Water bath canning is safe when you follow a few simple rules. Here’s what every beginner should know:
High-Acid Foods Only
Water bath canning is safe for foods with a pH of 4.6 or lower. That means fruits, pickles, and tomato products with added acid are okay. Low-acid foods like green beans, corn, or meats must be pressure canned—no exceptions.
Clean Everything
Start with clean hands, clean tools, and clean jars. Wash everything in hot, soapy water. If your processing time is under 10 minutes, sterilize jars by simmering them for 10 minutes before filling.
Follow Recipes Exactly
Don’t adjust vinegar, lemon juice, or sugar amounts in canning recipes. Even small changes can affect the pH and make your food unsafe for shelf storage.
Add Acid When Required
Even tomatoes sometimes need help reaching the safe pH level. Your recipe may tell you to add bottled lemon juice or vinegar—don’t skip it, even if your tomatoes taste acidic.
Check Every Seal
After processing, let jars sit undisturbed for 12–24 hours. Then check each lid: it should be firm and slightly concave. If it clicks or pops when pressed, store that jar in the fridge and eat it first.
When in Doubt, Throw It Out
If a jar smells off, has mold, leaked, or the seal popped up during storage—don’t risk it. Food poisoning is no joke, and botulism isn’t something you can see or smell.
With just a few smart practices and trusted recipes, you’ll be safely sealing up your homemade goodness in no time.
🫙 How to Water Bath Can: Step-by-Step
Ready to seal up your first batch of jam or pickles? Here’s exactly how to do it, one simple step at a time. Once you’ve done it once or twice, it’ll feel like second nature!
1. Prep Your Workspace
Clear your counters, wash your tools, and lay out a towel or cooling rack for finished jars. Fill your canning pot halfway with water and start heating it—especially if you’re working with hot-packed food.
2. Wash and Warm Your Jars
Clean your jars with hot, soapy water. If your recipe requires sterilization (processing time under 10 minutes), simmer the jars in hot water for 10 minutes. Otherwise, just keep them warm until filling.
3. Prepare Your Recipe
Cook your jam, pickle brine, or salsa according to a tested recipe. Stir well and keep it warm until it’s time to fill the jars.
4. Fill the Jars
Using a funnel, fill your jars with hot food, leaving the recommended headspace (usually ¼ to ½ inch, depending on the recipe). Use a bubble remover or spatula to release any trapped air.
5. Wipe the Rims & Apply Lids
Use a clean, damp cloth to wipe the rim of each jar—this ensures a good seal. Center a lid on the jar, then screw on the band fingertip-tight (not cranked tight!).
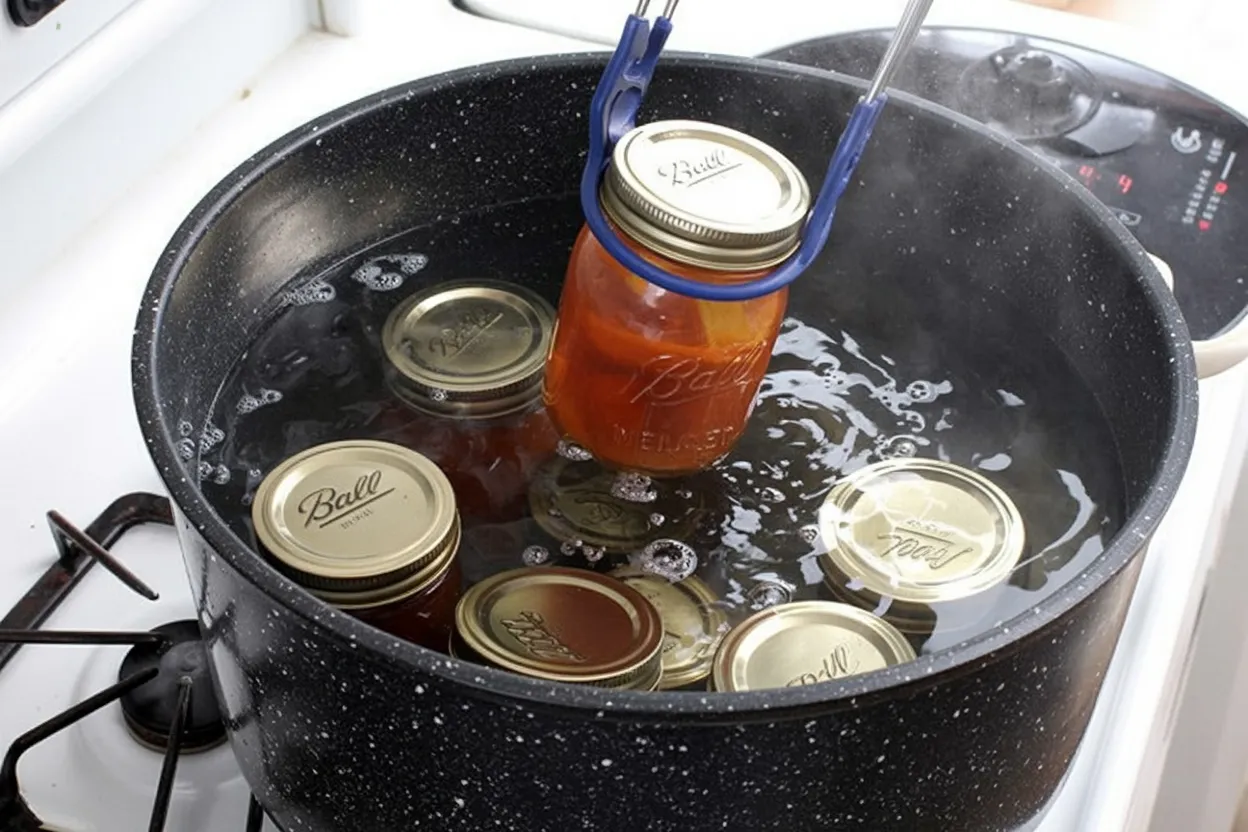
6. Place Jars in the Pot
Use a jar lifter to carefully place jars onto the rack in the boiling water canner. Make sure jars are upright and fully submerged with at least 1 inch of water above them.
7. Process Your Jars
Once the water reaches a full rolling boil, start your timer and process for the amount of time listed in your recipe (don’t guess—it matters!). Adjust time if you live at a higher altitude.
8. Cool and Check Seals
When time’s up, turn off the heat and let the jars sit in the water for 5 minutes. Then carefully lift them out and place them on a towel. Don’t tilt or shake! Let them cool undisturbed for 12–24 hours.
9. Check Your Lids
After 24 hours, press the center of each lid. If it doesn’t pop back, the jar is sealed! If it flexes, pop that jar in the fridge and enjoy it soon.
10. Label and Store
Label each jar with the contents and date, then store them in a cool, dark place. Most water bath canned goods last up to a year on the shelf (and often longer if stored well).
Rules You Really Need to Follow
Canning isn’t the time to get creative with measurements or “eyeball” ingredients. These rules might sound a little strict, but they’re here to keep your food safe and your jars shelf-stable. Stick to these, and you’re golden!
1. Use a Tested Recipe—Every Time
Canning recipes are based on science, not vibes. Only use recipes that have been tested by trusted sources like the USDA, Ball, or university extensions.
2. Don’t Skip the Acid
If your recipe calls for lemon juice or vinegar (especially in tomato-based products), add it exactly as instructed. It ensures the food stays at a safe pH level for water bath canning.
3. Use Proper Headspace
Too much headspace can prevent sealing, while too little might cause overflow. Always follow the headspace measurements in your recipe and use a measuring tool if needed.
4. Don’t Reuse Lids
Lids are one-time-use only when it comes to sealing. Reusing them may result in failed seals—even if they look fine. Save old lids for dry storage or crafts instead.
5. Adjust for Altitude
Living more than 1,000 feet above sea level? You’ll need to increase your processing time. Not sure how much? Look it up before you begin—it’s a quick fix that makes a big difference.
6. Never Tilt Hot Jars
It’s tempting to tilt jars to pour off water or check seals, but don’t do it! Tilting can break the seal before it has a chance to form properly.
7. Let Jars Cool Undisturbed
Once your jars are out of the water, leave them alone for 12 to 24 hours. Moving or touching them too soon can mess with the sealing process.
Following these simple rules will make your canning experience much smoother—and ensure that all your hard work results in safe, delicious jars you can be proud of. 🙌
Beginner-Friendly Recipes to Try First
When you’re just getting started with water bath canning, it’s smart to begin with simple, high-acid recipes that don’t require a lot of tricky steps or fancy ingredients. These beginner-friendly favorites are reliable, forgiving, and oh-so-satisfying to stock in your pantry.
1. Strawberry Jam
A classic starter recipe—just fruit, sugar, and maybe a splash of lemon juice. No pectin? No problem. Many strawberries have enough natural pectin to set on their own.
2. Dill Pickles
Crisp, tangy, and packed with flavor! Pickling cucumbers in vinegar brine is easy and fast. Just be sure to follow a tested recipe for safe acidity.
3. Applesauce
Peel, cook, blend, and can—homemade applesauce is simple and so much better than store-bought. Add cinnamon or leave it plain—both versions water bath beautifully.
4. Tomato Salsa
Want to try canning salsa? Look for tested high-acid recipes—these often include added vinegar or lemon juice to keep things safe. Bonus: it’s a crowd-pleaser!
5. Peach Preserves or Chutney
Perfect for late summer when peaches are everywhere! Sweet or savory, peach recipes are a beginner favorite thanks to their natural acidity.
Stick with one or two jars your first time, then grow from there. The goal is to build confidence—not stress out over a dozen jars all at once.
Common Mistakes to Avoid
We all make a few slip-ups when we’re just starting out—and that’s okay! But knowing what to watch for can save you time, stress, and maybe even a batch of jam. Here are the most common water bath canning mistakes (and how to avoid them):
1. Guessing Instead of Measuring
Whether it’s headspace, vinegar, or cooking time—eyeballing it doesn’t work in canning. Stick to the measurements in the recipe for safe and successful results.
2. Skipping the Bubble Removal Step
It might seem small, but trapped air bubbles can mess with headspace and lead to poor sealing. Always run a spatula or bubble remover around the inside edge of your jars.
3. Forgetting to Adjust for Altitude
At higher elevations, water boils at a lower temperature—meaning your food might not get hot enough without extra time. Look up your altitude and adjust your processing time accordingly.
4. Reusing Lids
This one’s a beginner classic. Lids are single-use only for canning—reusing them often leads to failed seals.
5. Not Letting Jars Cool Properly
Moving or tipping jars right after processing can break the seal. Let your jars cool completely and undisturbed for at least 12 hours before checking them.
6. Using Untested Recipes
Grandma’s salsa might taste amazing, but if it hasn’t been lab-tested for safety, it’s not worth the risk. Always stick to trusted sources for your canning recipes.
7. Storing Sealed Jars with the Bands On
Once your jars are sealed, remove the screw bands before storage. Leaving them on can trap moisture and lead to rust—or mask a broken seal.
A few flubs are totally normal, but learning from them is all part of the fun. Even the “mistakes” usually taste great—they just might need to be eaten a little sooner!
Water Bath Canning FAQs
Still have a few “but what if…” questions swirling around? Totally normal. Here are some of the most common water bath canning questions beginners ask—answered in plain English.
What if my jar didn’t seal?
No big deal! If the lid flexes or pops up and down when you press it, that jar just didn’t seal properly. Pop it in the fridge and eat it within a week or two. (Pro tip: label it so you don’t forget!)
Why is there space at the top of my jam?
That’s your headspace, and it’s totally normal—as long as you followed the recommended amount in the recipe. Don’t worry, it’s not supposed to be filled to the very top!
Can I reuse jars from store-bought sauces?
Nope. Those jars aren’t designed for home canning. They may not seal properly and are more likely to crack in boiling water. Stick with proper Mason-style canning jars.
Is it okay if my fruit is floating?
Yes! Floating fruit happens all the time with jams and canned fruits. It’s usually due to packing technique or air bubbles. It’s harmless—and still totally safe to eat.
What if my jam didn’t set?
This can happen, especially with low-pectin fruits or if it wasn’t cooked long enough. Let it sit a few days—it might thicken as it cools. If not, use it as syrup on pancakes or yogurt. Win-win!
Can I just use my dishwasher or oven instead?
Nope—definitely not safe. Dishwashers and ovens don’t get hot enough to kill bacteria or create a proper vacuum seal. Stick with boiling water in a pot or canner for safe, reliable results.
Water bath canning might have a bit of a learning curve, but once you’ve got a few batches under your belt, it starts to feel like second nature. When in doubt, check a trusted guide—or ask!
You’re Ready to Start Water Bath Canning!
Starting anything new in the kitchen can feel a little intimidating, but you’ve got this! With just a few simple tools, a trusted recipe, and a pot of boiling water, you can turn fresh ingredients into pantry treasures that last all year long.
Remember: start small, follow the safety rules, and enjoy the process. The more you can, the more confident you’ll become—and before you know it, you’ll be that person gifting homemade jam at Christmas like a total kitchen legend.
So grab those jars and get started—your shelf of sealed goodness is waiting!