20 Canning Tips for Beginners (That You’ll Wish You Knew Sooner!)
New to canning? These 20 beginner tips will help you avoid mistakes, seal jars with confidence, and stock your pantry with homemade goodness.
Inside this post:
Simple tricks to help your first batch go smoothly (and safely!)
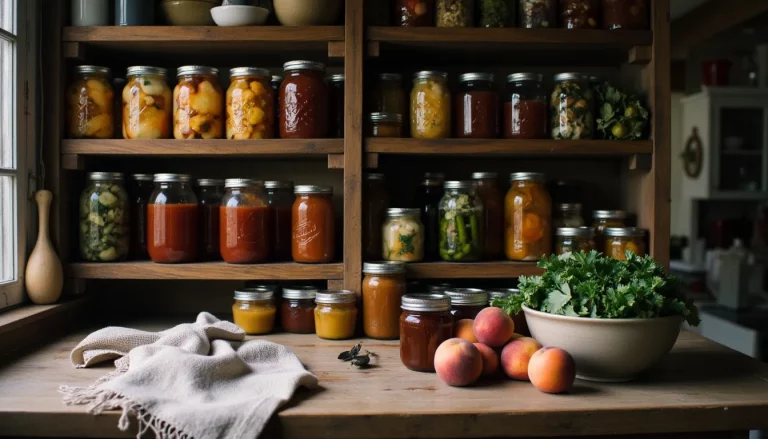
There’s nothing quite like lining up a row of jars you canned yourself—especially when they’re filled with homemade jam, crunchy pickles, or garden-fresh tomato sauce. But if you’re brand new to canning, it can feel a little intimidating at first. Pressure? Headspace? Processing times? What does it all mean?!
Don’t worry—you’re not alone. This list is packed with helpful, beginner-friendly canning tips to take the mystery (and the nerves) out of your first few batches. With a little prep and a few tricks up your sleeve, you’ll be sealing jars and stocking your pantry in no time.
Let’s get canning!
Getting Started
1. Start with a Tested Recipe
When you’re new to canning, don’t wing it or try to “eyeball” ingredients. Always follow a tested and approved recipe from a trusted source like Ball, the USDA, or a local extension office. These recipes are carefully designed to be safe, with the correct acidity levels and processing times to prevent spoilage and bacteria growth.
2. Pick a Beginner-Friendly Food
Not all canning projects are created equal—so set yourself up for success by choosing a recipe that’s easy and forgiving. Think: jams, jellies, applesauce, or dill pickles. These high-acid foods can be safely processed with water bath canning (aka no pressure canner needed), and they’re perfect for getting the hang of things.
3. Gather Everything Before You Begin
Canning moves fast once things heat up—literally—so it helps to have everything prepped and within reach before you start. Lay out your jars, lids, tools, and towels. Set your ingredients up in order. Trust me, nothing throws off your rhythm like trying to find the jar lifter with hot jam bubbling on the stove.
- Canning Day Tips – How to Make Your Day Run Smoothly
4. Use the Right Jars
Only use jars that are made for home canning, like Ball or Kerr brand Mason jars. They’re designed to handle heat and create a proper vacuum seal. Don’t reuse old commercial jars (like spaghetti sauce jars)—they might not seal properly or could crack during processing.
5. Check Your Jars for Cracks
Even a tiny chip around the rim or a small crack in the glass can ruin your batch—or worse, cause the jar to break mid-boil. Always inspect your jars before you fill them, especially if they’ve been used before. Run your finger gently around the rim and hold each jar up to the light to check for flaws.
Prep Like a Pro
6. Wash and Warm Your Jars
Even brand-new jars need a good wash before use. Clean them with hot, soapy water or run them through the dishwasher. If your recipe requires hot packing or your jars will be going straight into boiling water, keep them warm until you fill them—this helps prevent sudden temperature changes that could crack the glass.
7. Sterilize If Needed
According to the National Center for Home Food Preservation you only need to sterilize jars if your processing time is under 10 minutes. If your recipe calls for longer processing (which many do), the boiling water or pressure canning process will handle sterilization for you. If you do need to sterilize, just simmer jars in hot water (not boiling) for 10 minutes.
8. Wipe Rims Before Sealing
Before adding the lids, use a clean, damp cloth or paper towel to wipe the rims of your jars. Even a little bit of jam or sauce can interfere with sealing. This quick step helps ensure a tight, reliable seal every time.
9. Use a Funnel to Avoid Messes
A wide-mouth canning funnel is a total game-changer. It helps you fill jars neatly and evenly without spilling sticky sauces or jam down the sides. Cleaner jars mean better seals—and a lot less cleanup later!
10. De-Bubble Like a Champ
After filling your jars, always run a non-metal utensil (like a bubble remover tool or a butter knife) around the inside edge to release any trapped air bubbles. Bubbles can mess with your headspace and affect how well the jars seal—so this step’s small, but mighty!
During the Canning Process
11. Don’t Reuse Lids
The flat metal lids with the sealing compound are single-use only. Even if they look perfect, they might not seal again properly. Always use a brand-new lid for each jar. (The screw bands, though? Those can be reused again and again.)
12. Leave the Right Headspace
Headspace is the gap between the food and the lid. Too little and your jar might not seal—or worse, overflow. Too much and air could be trapped, leading to spoilage. Check your recipe for the exact amount and use a headspace measuring tool (or a ruler) if needed.
13. Adjust for Altitude
If you live more than 1,000 feet above sea level, your food won’t boil at the same temp as it would at sea level. That means you’ll need to increase your processing time or pressure depending on the method you’re using. Always check an altitude chart before starting.
14. Set a Timer
This isn’t the time to guess! Start your timer only once your pot is at a full boil (or full pressure) and stick to the recipe’s processing time exactly. Under-processing is one of the biggest mistakes beginners make.
15. Let Jars Rest After Processing
When time’s up, carefully remove your jars and place them on a towel or cooling rack. Don’t touch or tilt them, even if you’re tempted. Let them rest undisturbed for 12 to 24 hours to cool and seal completely.
Aftercare & Storage
16. Listen for the “Pop”
That magical little pop you hear as jars cool? It’s the sound of success! It means a vacuum seal has formed. Not every jar will pop audibly, so don’t worry if you miss it—but it’s still pretty satisfying when you hear it.
17. Check Each Lid After 24 Hours
Once your jars have fully cooled, press the center of each lid. If it doesn’t move, your seal is good to go. If it pops back or flexes, refrigerate that jar and use it first—it’s still safe, just not shelf-stable.
18. Label Your Jars
Always add a label with the contents and the date. Trust me, six months from now that jar of orange stuff could be jam, salsa, or pasta sauce! Labels save the guesswork—and help you keep track of freshness.
19. Store in a Cool, Dark Place
Keep your sealed jars in a pantry, cupboard, or basement where it’s dry and not too warm. Avoid direct sunlight or storing near the stove. A well-sealed jar can last up to a year (or even longer), but storage conditions make a big difference.
20. Don’t Be Afraid to Mess Up
Not every batch will be perfect, and that’s okay! Maybe a jar didn’t seal or your jam’s a little runny—it’s all part of learning. As long as you follow safe canning practices, even the flops can usually still be eaten (just stored in the fridge instead).
You’re Ready to Start Canning!
Canning might feel a little intimidating at first, but once you’ve got a batch or two under your belt, it becomes second nature—and honestly kind of addicting. These tips will help you avoid the common pitfalls and build up your confidence one jar at a time.
Remember: start simple, follow safe recipes, and don’t sweat the small stuff. Every sealed jar is a win (and every not-so-perfect one is still a learning moment… and usually still delicious!).
So go ahead—grab your jars, roll up your sleeves, and get canning! Your pantry is about to get a whole lot more satisfying.