Pressure Canner vs Water Bath Canner: What’s the Difference and Which One Do You Need?
Wondering if you need a pressure canner or a water bath canner? This beginner-friendly guide breaks down the difference, which foods go with each method, and how to choose the right one for your pantry goals!
Inside this post:
- 1 Do You Need a Pressure Canner, a Water Bath or Both?
- 1.1 What’s the Difference Between Water Bath and Pressure Canning?
- 1.2 Side-by-Side Comparison: Water Bath vs Pressure Canning
- 1.3 What Foods Go with Each Method?
- 1.4 Which One Should You Start With?
- 1.5 Beginner Buying Advice: What You Really Need to Get Started
- 1.6 Final Thoughts: Which One Do You Really Need?
Do You Need a Pressure Canner, a Water Bath or Both?
If you’re new to home canning, one of the first questions you’ve probably asked is:
Do I need a pressure canner or a water bath canner?
You’re not alone—this is one of the most common canning questions out there. And the answer depends entirely on what you’re planning to preserve. While both methods are safe and effective (when used properly), they serve very different purposes.
This beginner-friendly guide will walk you through the differences between water bath and pressure canning, help you figure out which one is right for your pantry goals, and make sure you’re set up to can with confidence. Let’s break it down!
What’s the Difference Between Water Bath and Pressure Canning?
The main difference between these two methods comes down to temperature and the type of food you’re preserving.
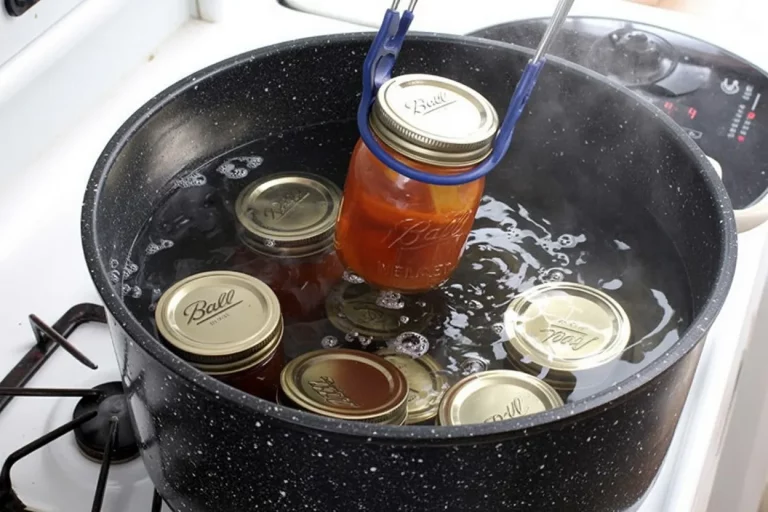
Water Bath Canning
- This method processes jars in boiling water (212°F).
- It’s safe for high-acid foods, like fruits, jams, pickles, and tomatoes (with added acid).
- The natural acidity of these foods helps kill bacteria, so a boiling water bath is enough to preserve them safely.
Pressure Canning
- This method uses a sealed canner to build steam pressure, which raises the temperature to 240°F+.
- It’s the only safe way to can low-acid foods like vegetables, meats, poultry, and beans.
- These foods need higher heat to destroy dangerous bacteria—especially Clostridium botulinum, the one that causes botulism.
Think of it like this:
High-acid foods = water bath.
Low-acid foods = pressure canner.
Side-by-Side Comparison: Water Bath vs Pressure Canning
Still not sure which method fits your food? This handy chart lays it all out so you can quickly see the difference between water bath and pressure canning at a glance:
| Feature | Water Bath Canning | Pressure Canning |
|---|---|---|
| Processing Temp | 212°F (boiling water) | 240°F+ (steam under pressure) |
| Foods It’s For | High-acid: fruits, jams, pickles, salsa (w/ acid) | Low-acid: vegetables, meats, broths, beans |
| Equipment Needed | Deep pot or water bath canner + rack | Pressure canner (dial or weighted gauge) |
| Processing Time | Shorter (usually 5–30 mins) | Longer (up to 90 mins depending on the food) |
| Learning Curve | Easier to learn, beginner-friendly | A bit more technical, takes practice |
| Startup Cost | Lower—can often use a stockpot | Higher—requires specialized canner |
| If Done Incorrectly | Risk of spoilage or mold | Risk of botulism—follow tested recipes carefully |
| Best For | Jams, jellies, fruits, pickles, salsas | Soups, vegetables, beans, meats, stews |
Quick tip: If you’re unsure whether a recipe needs water bath or pressure canning, check the acidity level. If it’s low-acid (like beans or broth), it must be pressure canned. Always follow a tested recipe to be sure.
What Foods Go with Each Method?
The easiest way to know which canning method you need is to look at what’s going into the jar. Some foods are naturally acidic and safe to water bath can, while others need the higher temperatures of a pressure canner to be safely preserved.
Here’s a quick breakdown of what goes where:
Water Bath Canning is great for:
- Fruit jams and jellies – strawberry, raspberry, grape, peach
- Fruit preserves and pie fillings – applesauce, canned peaches, cherry pie filling (with a tested recipe)
- Pickles and relishes – dill pickles, bread and butter pickles, sweet pickle relish
- Salsas – only when made with added vinegar or lemon juice in a tested recipe
- Chutneys and sauces – again, with proper acidity
- Whole fruits – packed in syrup or juice (pears, plums, etc.)
These foods are high in natural acid or are acidified with vinegar or lemon juice—so they don’t require the extreme heat of pressure canning to be safe.
Pressure Canning is required for:
- Low-acid vegetables – green beans, carrots, corn, peas, potatoes (peeled and cubed)
- Dried beans and legumes – pinto beans, black beans, chickpeas (pre-soaked and partially cooked)
- 🍲 Soups and stews – without thickeners, dairy, or pasta
- Meats and poultry – chicken, turkey, beef, pork, ground meat (pre-browned)
- Stocks and broths – chicken stock, beef bone broth, veggie broth
If it’s not acidic—and especially if it contains meat or veggies—it’s a pressure canning job. There’s no safe shortcut here, so always follow a tested recipe.
Which One Should You Start With?
If you’re brand new to canning, it’s totally normal to feel unsure about where to begin. The truth is—you don’t need both a pressure canner and a water bath canner to get started. Pick the method that matches your comfort level, storage space, and what you’re most excited to preserve.
Start with Water Bath Canning if…
- You’re canning for the first time
- You want to make jam, jelly, pickles, or fruit preserves
- You already have a large pot at home
- You’re looking for a budget-friendly way to try canning
- You want something simple and beginner-friendly
Water bath canning is a great confidence booster and a fun way to dip your toe into preserving food without needing special equipment.
Start with Pressure Canning if…
- You want to preserve vegetables, meats, or full meals
- You’re growing a garden and want to preserve your harvest
- You’re prepping shelf-stable meals for convenience or emergencies
- You’re ready to learn a slightly more advanced method
- You’ve tried water bath canning and want to level up your skills
Pressure canning has a learning curve, but once you get the hang of it, it opens up so many more pantry options—beans, broth, chili, soups, you name it.
Beginner Buying Advice: What You Really Need to Get Started
Ready to pick your canning setup? Whether you’re starting small or going all in, here’s what to look for when choosing the right gear for your first batch.
Water Bath Canning Gear for Beginners
You can get started with water bath canning using basic, affordable tools—many people already have a few of these at home!
What you’ll need:
- A large stockpot or water bath canner (must be deep enough to cover jars with 1–2 inches of water)
- A canning rack or silicone trivet to keep jars off the bottom
- Mason jars with new lids and bands
- A basic canning tool kit (funnel, jar lifter, bubble remover, magnetic lid wand)
Pro tip: You can find beginner kits that include everything but the pot—perfect for dipping your toes in without spending too much.
Pressure Canning Gear for Beginners
If you’re ready to start pressure canning, here’s what to look for when buying your first canner:
Choose between:
- Dial gauge canner – Requires annual testing for accuracy
- Weighted gauge canner – Doesn’t need testing; uses a weight that jiggles to regulate pressure
Popular brands:
- Presto – Budget-friendly and great for beginners
- All American – Heavy-duty, long-lasting, no rubber gaskets to replace
Other essentials:
- A canning tools kit (same as water bath)
- A little counter space—pressure canners are larger and heavier
Not sure which to get? If you only want to can fruit and jam, start with water bath. If you dream of jars of chicken soup or home-canned green beans, pressure canning is worth the investment.
Final Thoughts: Which One Do You Really Need?
If you’re still unsure whether to start with a pressure canner or a water bath canner, here’s the good news: there’s no wrong choice. The best method for you is the one that fits your comfort level, your kitchen, and your food goals right now.
- Want to ease in with jam, jelly, or pickles? Water bath canning is your jam (literally).
- Want to preserve hearty soups, vegetables, or meat? Time to meet your new best friend: the pressure canner.
Once you know what each method is for, the mystery disappears—and you can focus on filling jars with food you love and trust.
Ready to start? Check out:
- Water Bath Canning for Beginners – Your step-by-step starter guide
- Pressure Canning for Beginners – Everything you need to can low-acid foods safely
- Canning Supplies Checklist – What you really need to get started (and what you can skip)
Happy canning!